Blog Archives

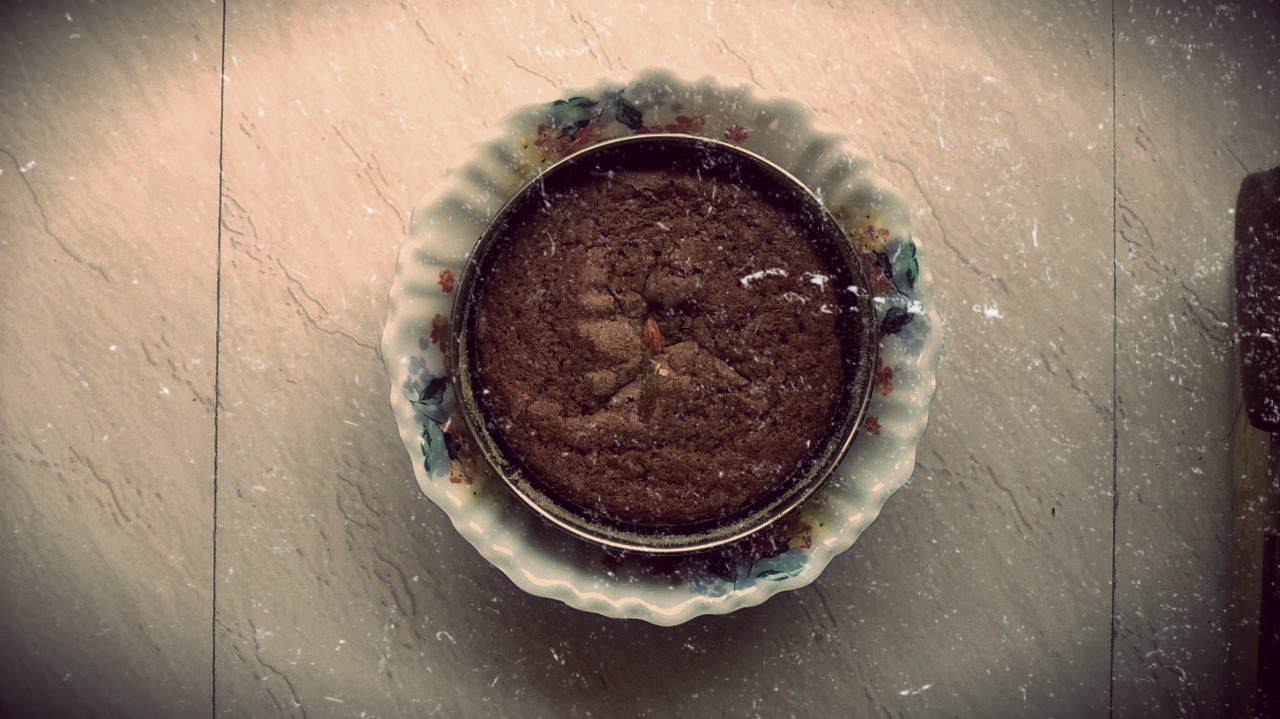
My Version of Basic No-oven Eggless Cake. Slightly spiced. Nutty. Crusty yet moist!
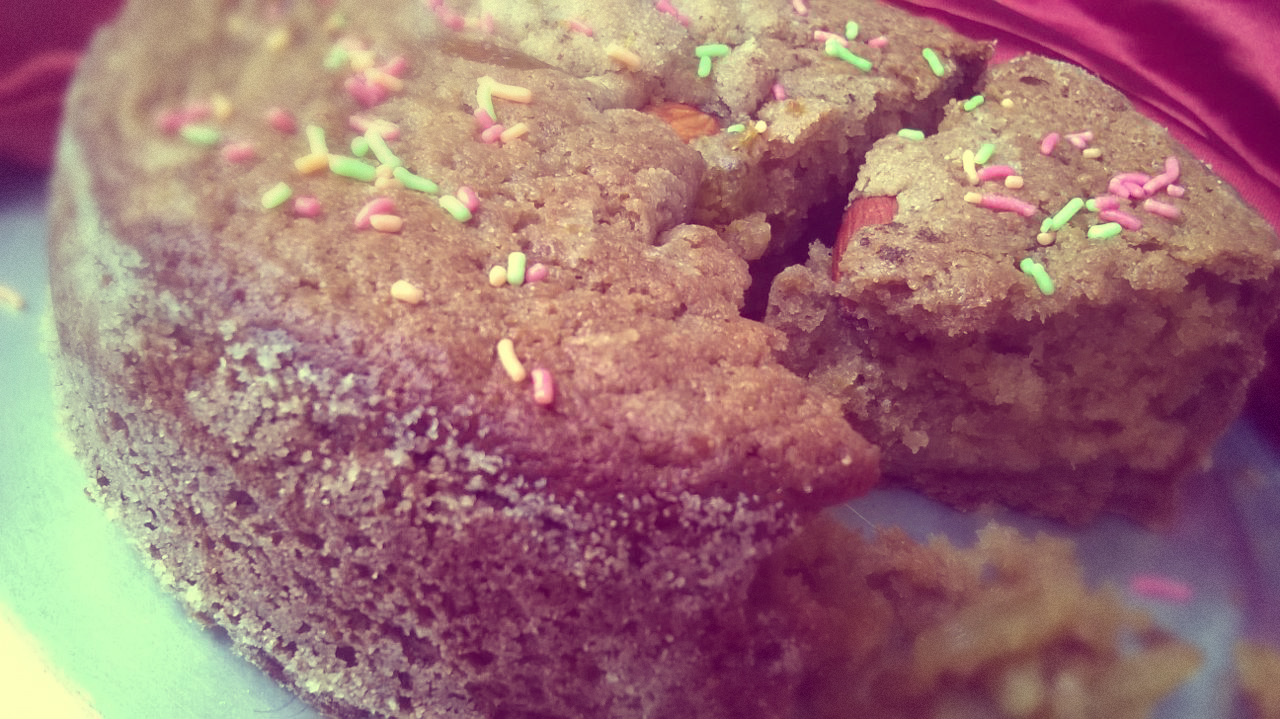
Nutty. Crusty yet moist!
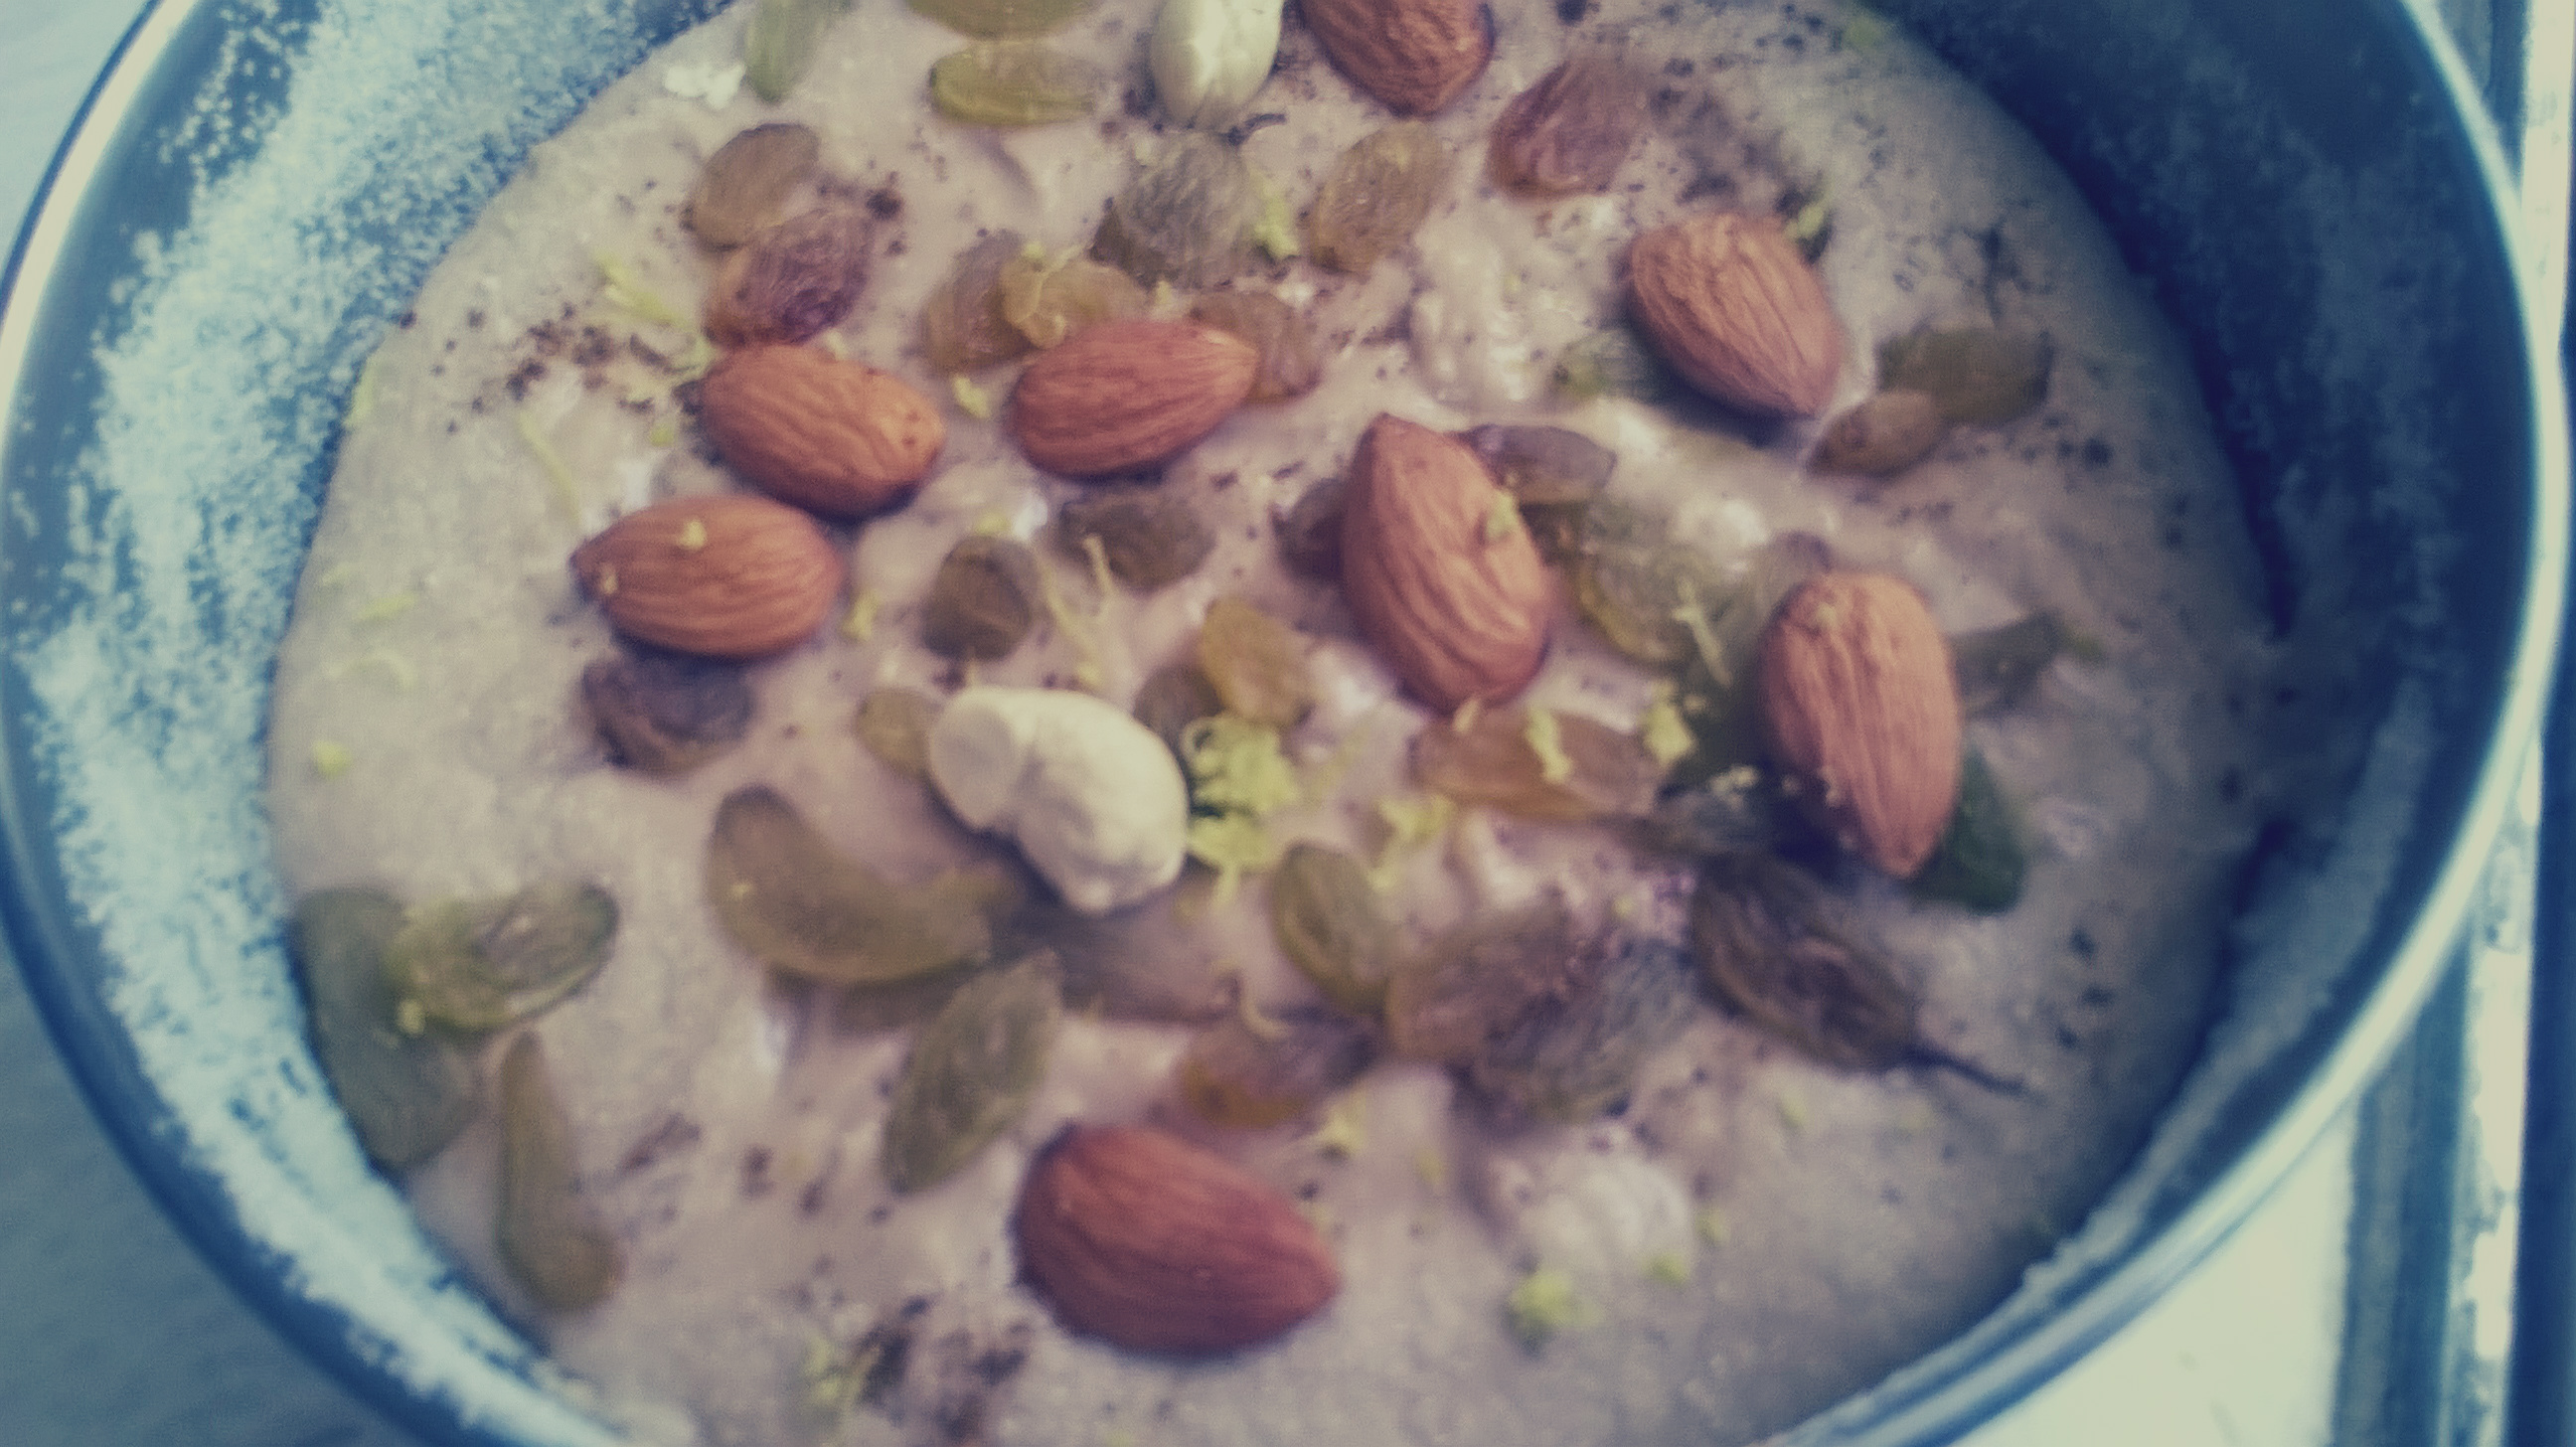
The cake batter before baking
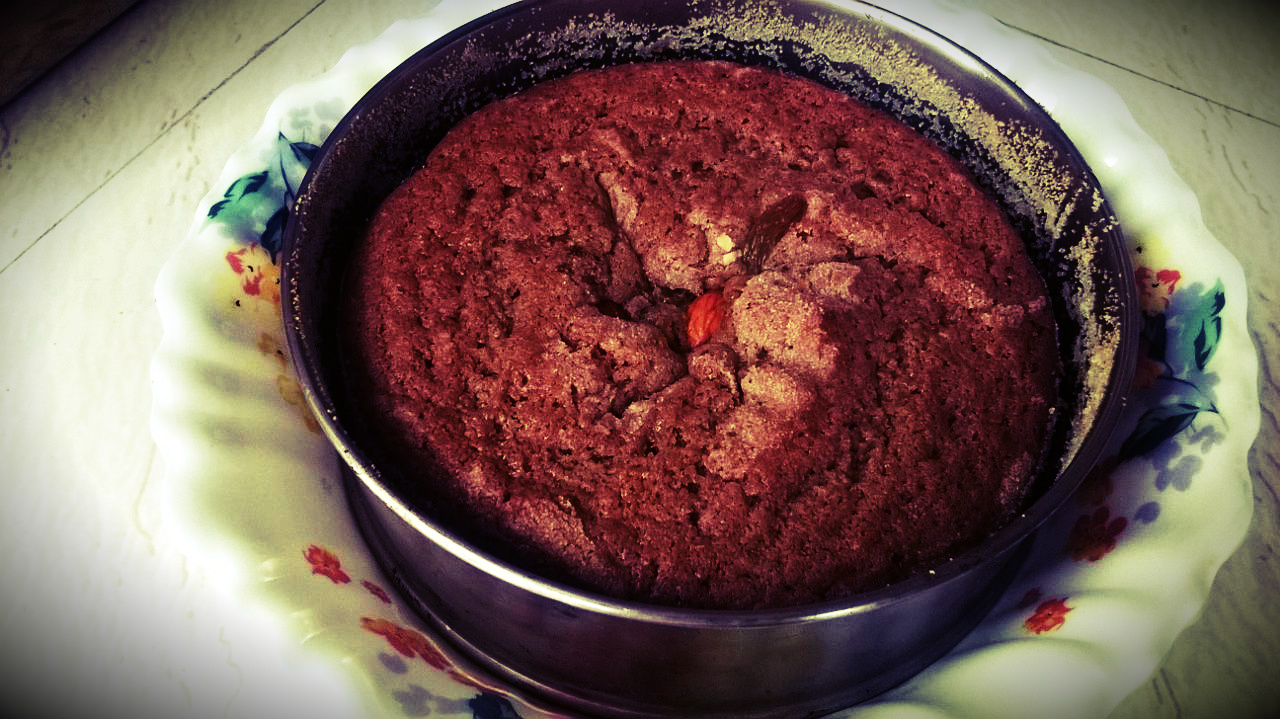
Golden crust. Nutty. Spiced.
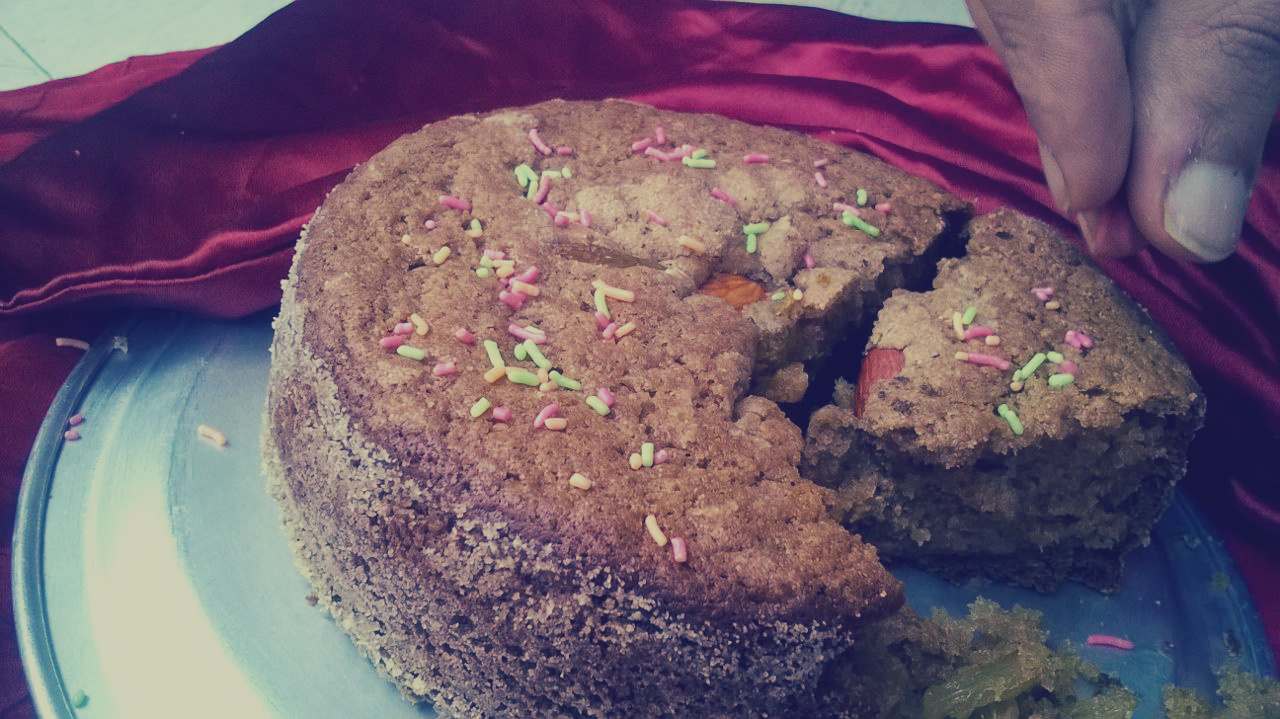
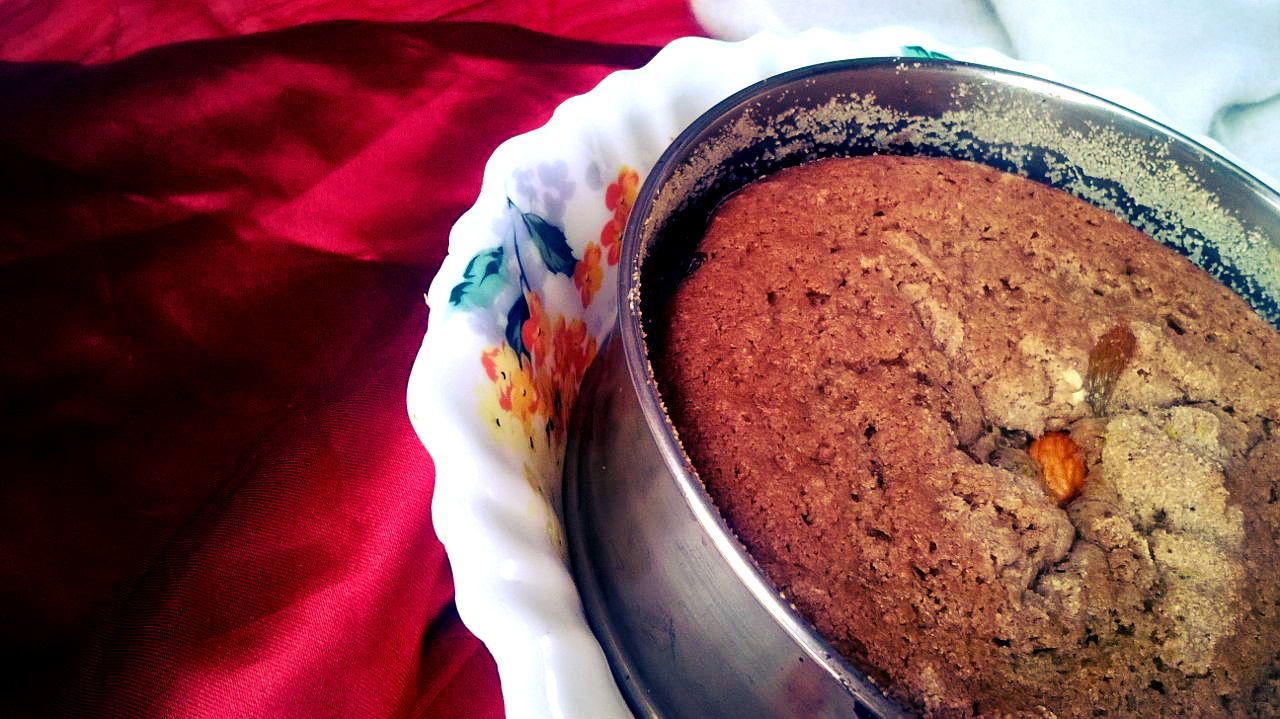
My Version of Basic No-oven Eggless Cake. Slightly spiced. Nutty. Crusty yet moist!

My Version of Basic No-oven Eggless Cake. Slightly spiced. Nutty. Crusty yet moist!
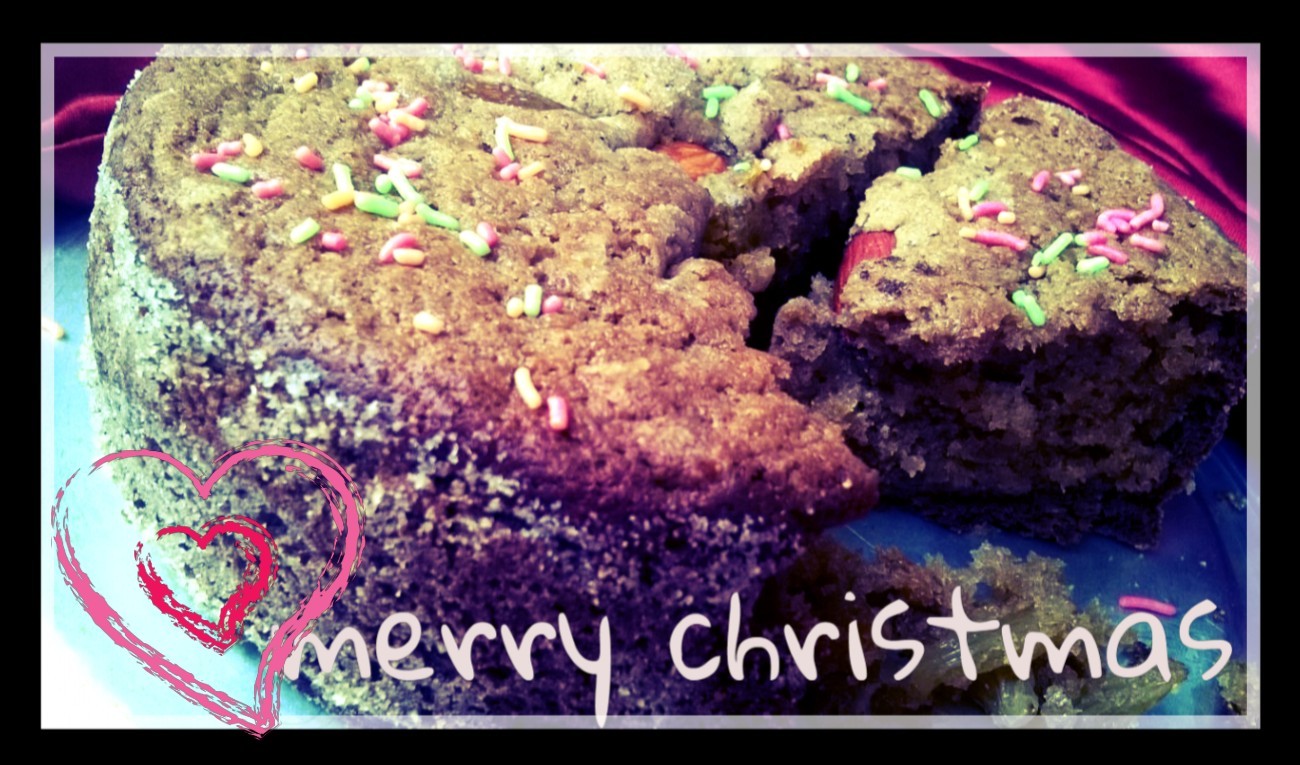
#MerryChristmas Sprinkle love and garnish with compassion
Sweet memories of Nostalgia and childhood
So, its Christmas today. Wasn’t particularly chirpy. Rather depressing. I am just trying to distract myself from some disturbing thoughts.
So thought of baking a cake. Turned out absolutely fantastic. Had tried in the past, couple of times with great disastrous results.
And wait, this was baked in a cooker (pressure cooker) and tasted no different than.. infact better than… a convection oven/ microwave version. Though its perfect for an oven too.
You got to trust my recipe because I am a novice. Hence would give detailed basic recipe with in-hand experience tips.
Thanks for host of recipes available online on basic sponge cakes. I have added my twist to suit my taste for a nutty crusty moist non-creamy feel to my mouth.
Great for beginners!
Note The Ingredients
All Purpose Flour (Maida) : 1/2 cup
Whole Wheat Flour (Aata) : 1/4th cup
Semolina (Suji/rawa) : 1/8th cup
Milk : 1/4th cup
Condensed Milk : 1/2 cup
Ghee/Clarified Butter : 1/2 cup
Curd/Yoghurt : 1/2 cup
Sugar/ powdered sugar : 1/4th cup
Salt : a small pinch
Baking Powder : 1 1/2 tsp
Baking Soda : 1/2 tsp
Cocoa Powder : 3 tsp
Vanilla Essence: 1/2 tsp
Lemon zest : 1/2 tsp
Garam masala/ or just cinnamon powder : Just a pinch
Almonds, Raisins, Cashews : 1/2 cup
Cake Garnish Sprinkles: Optional : 2 tsp
-
Take a big bowl. Sieve into it the all purpose flour, whole wheat flour, semolina, baking powder, baking soda, cocoa powder all together
-
In another bowl, mix/lightly whisk the milk, condensed milk, yoghurt/curd, vanilla essence, lemon zest. Keep aside.
-
Melt the clarified butter/ghee separately
-
Now, blend/whisk the sugar into the melted clarified butter/ ghee well. Keep aside
-
In to the big bowl of dry ingredients (i.e. the mix in point no.1)… add the mix from point no. 4 ( clarified butter + sugar) and mix from point no. 2 (milk, condensed milk, yoghurt/curd, vanilla essence, lemon zest )
-
Whisk/fold it all together. Never over whisk or over blend a cake mix. The bubbles and the fluffiness are good.
-
The batter shouldn’t be runny. It should be thick yet velvety. (not too tight when you try to run a whisk through it)
-
Taste this batter to check if you want more sweetness
-
Top it up with the nuts and raisins
-
Sprinkle pinch of Garam Masala or Cinnamon powder
Baking/Cooking method
1. Take a container that fits inside an aluminum cooker
2. Grease this entire container with clarified butter by applying it with a greasing brush or hand
3. Add 1 tbsp semolina/flour to it and dust/coat the entire container for a dry layer. This helps the cake come out easily once ready. Tap out the excess.
4. Add the cake batter mix into this container gently with a flat ladle/spoon
5. Remove the circular rubber/ gasket and the whistle lid from the pressure cooker
Aluminum Pressure Cooker
6. Add one to two cups of salt in the bottom of the cooker
7. Close the lid and let heat for 5 to 6 minutes. (Just like we need to preheat too when baking in an oven)
8. Now open the lid
9. On this base of the salt carefully keep a small steel bowl or some kind of separator
10. Carefully place the container with batter on top of the separator
11. Close the lid
12. Heat on high for 5 minutes. Then lower the heat
13. Relax. Set an alarm of 40 minutes
14. After 40 minutes check by carefully opening the lid
15. The cake should have risen by now with a beautiful brown crust and aroma
16. Insert a fork. It should come out clean. If not cook for few more minutes.
17. Let cool slightly once ready.
18. Take the container out and invert/flip it upside out down into a big flat plate by tapping to unmould . Flip again on a different plate so that the garnished top is visible.
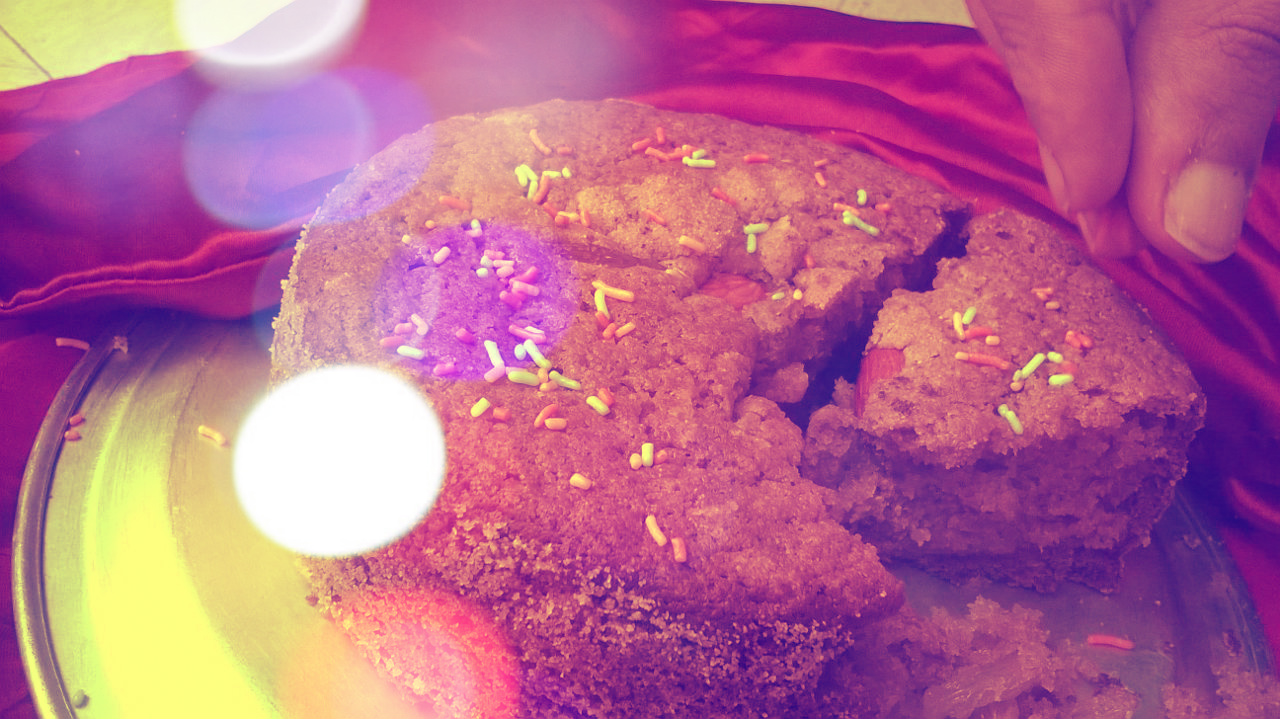
19. Garnish the top with sprinklers
20. Go eat!
Important Tips
1. You can use the same recipe and bake in an oven as well.
- You can bake in a pre-heated oven at 180ºc (360ºf) for 30 minutes
2. You can vary the amount of cocoa powder depending on how chocolaty you want it
3. You can add more of all purpose flour if you do not have semolina. Semolina adds crispiness though
4. If you do not have condensed milk, replace with full cream milk
5. Almonds add great nutty flavour. You can add or decrease the nuts as per your wish. Don’t go overboard though else it will get too rich too handle! Atleast I like my cake simpler.
6. Greasing the container and coating it with flour is important to help the final cake come out of it beautifully and avoid sticking it to the container
7. Powdered sugar is recommended however I used simple sugar and it was just fine
8. never over-beat a cake mixture batter
9. Pre-prep is crucial while baking. Measure accurately and proportionately to avoid disasters and wastage. You can always vary the ingredients once the batter is ready before baking it
10. Though strongly recommended to use the same, however if you do not have clarified butter, replace it with unsalted butter or oil if you want. Don’t compromise on the quantity of fat though for this cake
11. Don’t add water to pressure cooker. Salt at the base helps create a oven like environment.
12. Let the cake container not stick to the sides of the cooker
![]()
Sharing is fun.


Sewai Kheer/ Vermicelli dessert – a rich noodly milky delight

Sweet vermicelli kheer or dessert
A lil birdie visited me today. I saw her and thought to myself, she must be hungry… And so was I… Well she flew away, but the thought remained…


The TV telecasted sweet savories and the mind played tunes of some sweet and bitter memories…while calls poured in since it was a so-called special day…

While I sat back relaxed…not in the mind though, I decided to whip up a sweet vermicelli/sewai kheer.
Rice Kheer is a popular dish on special occasions, but many like the sewai version better because its less heavy and tastes beautiful and sometimes like sweet soupy noodly goodly delight…
As Wikipedia aptly informs…”Vermicelli is a traditional type of pasta round in section similar to spaghetti.…The dish in the original language are variously known as seviyan in Urdu and Hindi, shemai in Bengali, sev in Gujarati, shavige in Kannada, sevalu or semiya in Telugu, and semiya in Tamil and Malayalam. The noodles are used in a number of dishes including a variation of kheer, a sweet dessert similar to rice pudding. Vermicelli are also used in many parts of India to make a popular dish called upma. ”
Sometimes, you don’t want a full fancy meal but want to revive old memories…you want replicate the original with right proportions..and nothing fusiony, experimental.. because somethings are good the good’ol original way!
For this recipe for two servings..
–>You need One litre of full cream good quality milk. Since milk is the main ingredient here. So no comprise!
–>Half a fist of sewai/vermicilli or a ratio of 2:6 (6 being milk)
–>Sugar: one fourth quantity of the milk or 2 to 3 tbsps of sugarfree sweetners for the calorie conscious.. sigh!
–>Milkmaid or condensed milk
–> Cashews, raisins, almonds
–>Cardamom powder if you like the taste of cardamom
–>Saffron (Optional..add if you want to add that shaahi/royal touch)
- Let the milk boil in a deep thick bottomed pot on low flame till reduced. Try reducing it to half by continuously supervising that the milk doesn’t get stuck to the bottom of the pan. You can ensure that by stirring it in between, and keeping a ladle in the milk.

- Take another pan and roast the broken vermicelli in half tsp of ghee/clarified butter.
- Use a roasted vermicelli packet in which case you need to roast these for 2 to 3 minutes only otherwise till lightly pink or golden brown.

- Keep the vermicilli aside and roast the nuts in the same pan in ghee and switch off flame once they are just about roasted. Keep an eye to avoid burning of these nutty nuts.
- Meanwhile once the milk starts reducing add the sugar and milkmaid.


- After stirring and having reduced the milk to desired level, add the vermicelli evenly. (Actually since we are using condensed milk, you might avoid reducing it all the way to half, reducing it just a little to get a thicker texture is enough)


- Stir to avoid lumps from forming.
- Add the raisins so that they swell up and cuddle up with the lovely ingredients that have already created a storm in the pot with a lovely aroma.


- After another 10 to 12 minutes add the roasted nuts and if you like few roasted grated almonds.
- Sprinkle little pinch of cardamom powder.
- Add the few saffron strands.
- Switch off the flame.
- Let it stand for couple of minutes. Serve slightly warm in your favourite bowl and I say two spoons for a sweet, memorable experience with your loved one.

Might be good to keep in mind:
–> Vermicelli have a tendency to thicken up in milk so its better to take lesser quantity compared to the milk and have it warm.
–>Roasting the nuts before adding to the kheer helps get a rich aroma, although personally I like the kheer without any nuts or raisins somehow
–>The things with such sweet /dessert is that the proportion is very important and the method helps make or break the dish.
–>Sometimes lot of people do not reduce the milk for this kind of dessert, but reducing it gives the rich gooey creamy taste and texture of milk that makes the cooking worth it. Just make sure that the quantity of vermicelli is much much lesser to the milk.
–>Once you add the vermicelli the texture starts thickening. So its good to keep an eye.
–>If you in trouble reducing the milk and to not burn it at the bottom consider using a thick bottomed kadhai and you are safe!
–> Try the chilled version with kulfi and some chopped cadbury chocolates for another heavenly experience
–>Adding the raisins while cooking helps them swell up which many love to eat that way only


Participated in the interactive forum Fiesta Friday hosted at http://thenovicegardener.wordpress.com/
![]()


